Showing posts with label Technology. Show all posts

Tuesday, September 13, 2016

Dowloading youtube videos with a batch file with youtube-dl on Linux.

Youtube-dl is a command-line program to download videos from YouTube.com and a few more sites. You can download your favourites videos quickly and easily.

First, install Youtube-dl on your system from: https://rg3.github.io/youtube-dl/download.html

You have different ways to install the application, I used this one:

sudo wget https://yt-dl.org/downloads/latest/youtube-dl -O /usr/local/bin/youtube-dl

sudo chmod a+rx /usr/local/bin/youtube-d

Note: Remember youtube-dl requires Python version 2.6, 2.7, or 3.2+.

Youtube-dl has a lot of different functionalities, you can see all of them with the command Youtube-dl --help but I'm going to show you just a basic command to download videos.

Allright, we've installed Youtube-dl on our system so we need to create a txt file with the youtube's links. The URLs should be arranged in a list having only one URL and nothing else on each line, with a new line for each URL in the list, please see the below example.


After created your batch file, you can test your batch running this command from the terminal:

youtube-dl -c --title --simulate --batch-file='/path/to/yourbatchfilehere.txt'


If you use --simulate, you are not running the real command, you have to remove --simulate to start downloading your videos but this command will let you know if everything is well, when you remove this option, the real output should look something like this (I using -v verbose):


Now you are able to store\watch your favourites videos directly on your computer.


I'm showing here just the simplest and fastest way to download many videos at the same time, Youtube-dl is a powerful and simple to tool to download videos from youtube, you have a lot of options to use for example to change video formats, write subtitles files, use authentication, etc. I suggest you to investigate any of these functionalities. See you next time.

We're reading!!!

Tuesday, December 8, 2015

Huayra: la distro Argentina para educar.


Spanish Version:

Hola a todos!!!: acá estoy de regreso escribiendo nuevamente sobre el Open Source. En esta ocasión voy a escribir sobre Huayra, el sistema operativo del programa conectar igualdad de Argentina destinada a educación.

Huayra es otra distro más del mundo de Linux basada en Debian Jessie, esta distro esta orientada para la parte de educación Argentina, especialmente para los chicos. Huayra viene pre instalado en las netbooks que entrega el Gobierno Nacional pero también se puede descargar para ser utilizado libremente si te interesa haciendo click aquí.


 Tenemos dos versiones para instalar x86 y x64 de la versión 3.1. También hay wallpapers, iconos, sonidos y ventanas para descargar de manera separada en caso de que estemos interesados en customizar mucho más nuestro OS.

No voy a entrar en detalles de como realizar la instalación, es realmente muy intuitivo y sencillo. También esta la Wiki oficial con los pasos para instalar el sistema de diferentes formas. Prefiero dedicar más tiempo en las cosas que forman parte de Huayra.

La interfaz:

Una vez finalizada la instalación, vamos a ingresar al escritorio de Huayra, el usuario esta creado automáticamente con su contraseña (alumno), no tenemos permisos root así que lo tendremos asignar nosotros en caso de que sea necesario.

La interfaz es muy colorida con colores pastel e iconos divertidos, esta más que claro que el diseño es orientado a los más chicos. Tenemos una barra de Gadgets en donde podremos customizar nuestro escritorio.


Huayra utiliza el entorno de escritorio Mate pero podemos utilizar otros como GNOME, KDE, etc. en caso de que no nos guste el que viene instalado con el sistema.

Aplicaciones:

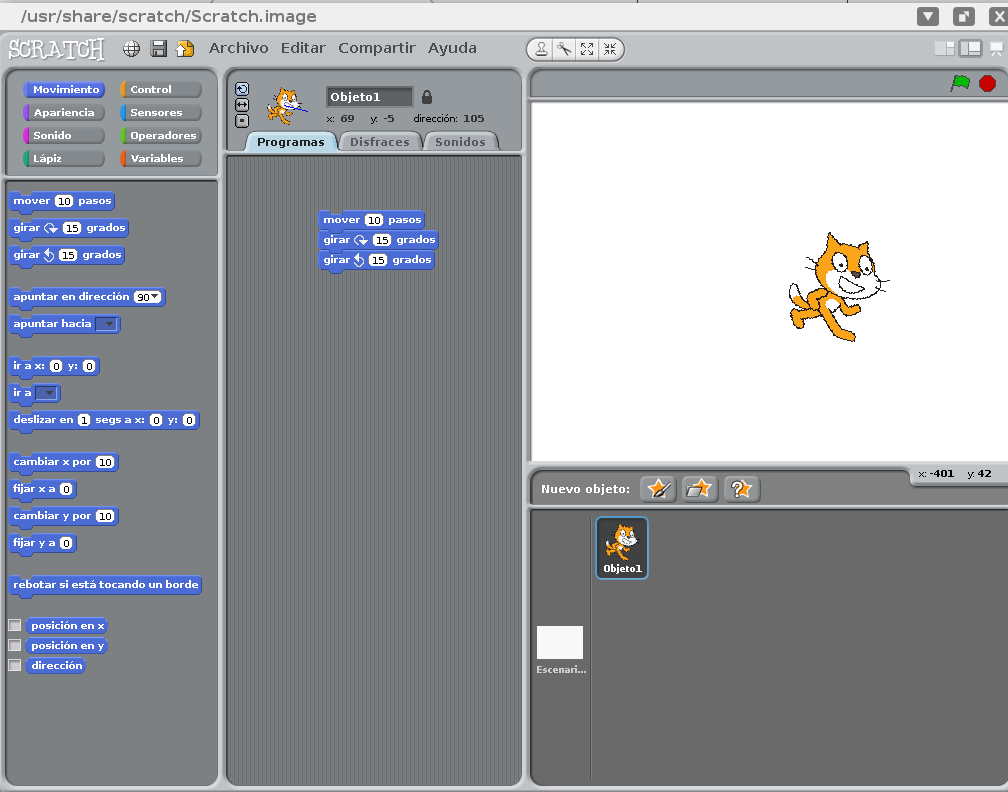
Este a mi parecer es el punto fuerte de Huayra, al ser una distro orientada a la educación cuenta con muchas aplicaciones educativas instaladas predeterminadamente, la cantidad es grande sinceramente, tenemos aplicaciones para estudiar astronomía, la tabla periódica de elementos, realizar gráficos al mejor estilo Autocad, simulaciones y hasta programas de programación conocidos como Scratch, Ninja IDE o Python por mencionar algunos de ellos.

Realmente cualquier alumno o profesor cuenta con un gran y no poco importante abanico de aplicaciones para realizar lo que sea.


¿Porque elegir Huayra?

Al momento de elegir porque deberíamos utilizar Huayra el motivo principal es para aprender y estudiar con ella. Huayra cuenta con un grupo de diseñadores y programadores que están desarrollando y manteniendo aplicaciones específicas para esta distro, algunas de ellos son:

- Huayra Curriculum: para crear de forma rápida y sencilla un curriculum.
- Huayra Motion: aplicación destinada a realizar trabajos con stop motion.
- Huayra Preciosa: una especie de consulta de precios cuidados online para saber si los precios de góndola están inflados o no y poder reportarlo.
- Pilas Engine: para programar videojuegos.
- Huayra Televisión digital abierta: para ver televisión abierta.


Hay varias formas de participar en el proyecto Huayra, como programador, como debbuger, documentando o simplemente utilizándolo.


Conclusión:


Huayra es una gran distro orientada a la parte educativa. Desde mi punto de vista una gran propuesta para los más chicos, estudiantes y el mundo docente. En los últimos años el desarrollo de software en Argentina creció de manera exponencial y hoy se apunta a enseñar a las nuevas generaciones sobre el desarrollo de aplicaciones desde temprana edad.

Huayra puede ser utilizado por estudiantes de cualquier edad, quizás lo adultos no prefieran una interfaz tan infantil y decidan cambiarla por otra cosa pero hay casos en donde los que todavía tienen un niño adentro les parezca genial como a mí.

La importancia que veo con este tipo de iniciativas, es que se apuesta al Open Source para el aprendizaje, los más chicos pueden comenzar a entender que existen otras cosas más allá de Windows, gratuitas y muy poderosas también. Elegir Huayra es seguir apostando a desarrollar aplicaciones o juegos libres sin restricciones ni licencias, seguir alimentando el semillero de profesionales del sotware, diseño y también para divertirse un rato.

Para que Huayra sea exitoso a mediano o largo plazo, es un compromiso de docentes y padres para que los chicos vayan decidiéndose por esta opción con los argumentos antes mencionados, esto va a permitir poder seguir desarrollando aplicaciones específicas para esta distro y para las ya existentes. Recomiendo mucho empezar a utilizar este SO sobretodo si sos estudiante o un amante de Linux.

Nos leemos!!!


Monday, October 19, 2015

My first time with Linux Mint. Mi primera vez con Linux Mint.


English Version:

Hello everyone, long time since my last post, I apologize, the last few months I was very busy but I'm here again to write.

Today I want to tell you about Linux Mint, another operating system Free and Open Source. I have been using Ubuntu for years on my computer, some months ago I wanted to try something different and but not so different to my loved Ubuntu, especially after version 15.04 that it did not convince me.

I heard about Linux Mint some years ago, so I decided to install it and tell you my experience.

Linux Mint is based on Ubuntu so it was ideal to leave it by a similar alternative and Open Source with the slogan that it has a modern and elegant interface.

Mint has 4 editions, the same are:


  • MATE Edition (uses a MATE desktop)
  • Cinnamon Edition (uses a Cinnamon desktop)
  • KDE Edition (uses a KDE desktop)
  • Xfce Edition (uses an Xfce desktop)


You can choose whatever you like, something I found interesting it is that we have an ISO with the codecs already installed on the operating system that will save you time in customizing your system or if you do not want to violate any law you can download  any without the codecs especially if we are in a country with strong patent laws such as Japan and USA. You can download the version 17.2 Rafaela here.


Installation is really simple and fast, almost equal to Ubuntu installation.

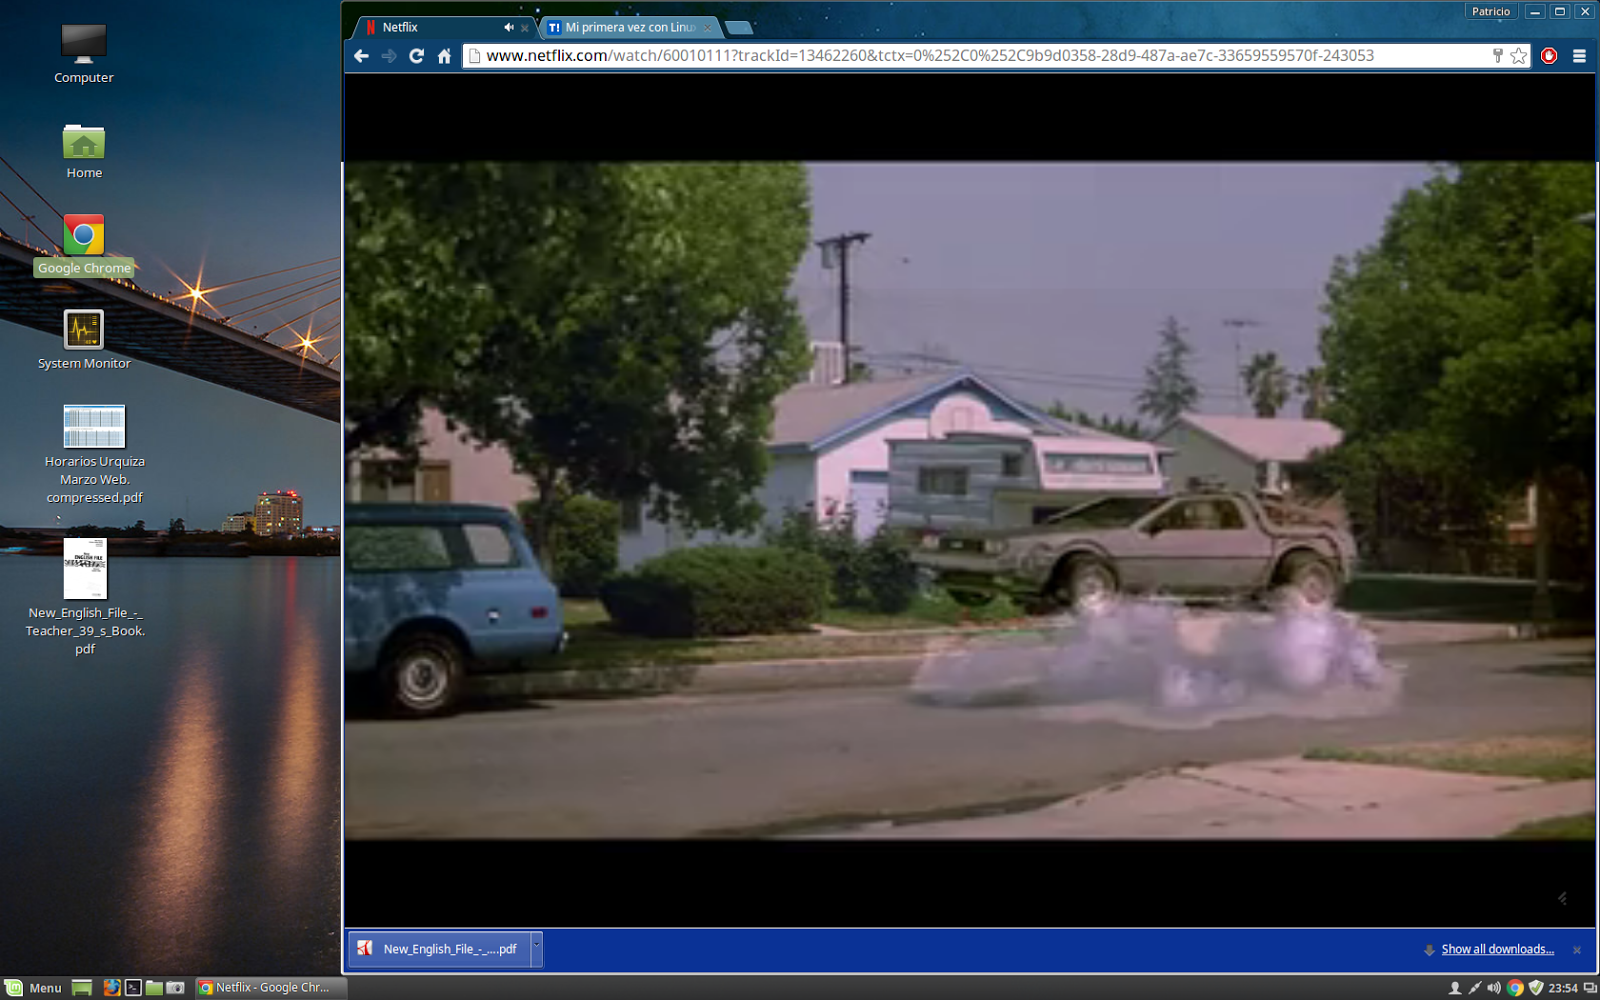
Once the installation is complete, I checked the system a bit and I kept thinking few minutes "what do I need to do now?, Mint had already installed all the codecs and some commonly used applications that are not included in Ubuntu as VLC, Gimp and others so installed some applications I use and started testing, I found it amazing for beginners users looking for something like Windows in use and does not hinder their lives with complex installations.

The first thing that surprised me is the clarity and cleanliness desktop with its wallpapers, the colours of the task bar, the Mint start button and the icons of some standard applications like Firefox, the shell and the file explorer.


The presentation of the start menu I loved it too, its icons and buttons, I was tired of the rare and sometimes complicated Unity interface and I was looking back to the old idea of the classic start menu without having to modify the system as in Ubuntu.


The system performance is very good and stable, I don't know if it was my impression but I noticed a minimal drop of performance when I was playing movies or watching videos on youtube comparing with Ubuntu, something almost imperceptible.

The way to customize the system to place your favourite applications in the task bar, the Start menu or the desktop itself is a wise idea, especially for no expert users and very familiar with Windows, something that in other distros this is not so simple to do.

The File Browser is similar to other distros only with Mint colours presentation.


The big advantage for those who are familiar with Ubuntu, is that installing applications remains equal with the APT command mainly, the software repository is the same as application compatibility that you can install outside the software repository, things that greatly facilitate the platform migration.

Conclusion:

For those skilled Linux users, Mint is not for you, you will get bored quickly and especially if you do not have interest in the visual of the operating system.

Linux Mint is a powerful and interesting alternative to leave Windows for beginners or advanced users, a modern distro, soft and friendly, something I personally thought was pending on the Linux's world and for this reason the Users are not yet decided to leave Windows definitely. After installing Linux Mint is just starting to use it without difficulty.

I am convinced that Linux Mint deserves a chance to be tested, if Mint follows this road and achieves greater maturity I think it could be a possible replacement for Ubuntu if the things do not improve after version 15. As definite strong point is free of cost and open source with all that that means.

I hope you are well. We reading!!!

System requirements:

512MB RAM (1GB recommended for a comfortable usage).
9GB of disk space (20GB recommended).
Graphics card capable of 800×600 resolution (1024×768 recommended).
DVD drive or USB port.

Notes:

The 64-bit ISO can boot with BIOS or UEFI.
The 32-bit ISO can only boot with BIOS.
The 64-bit ISO is recommend for all modern computers (Almost all computers sold in the last 10 years are equipped with 64-bit processors


Spanish Version:

Hola a todos, hacía tiempo que no escribía, les pido disculpas, los últimos meses estuve muy ocupado pero acá estoy de nuevo para escribir.

Hoy quiero contarles sobre Linux Mint, otro sistema operativo Free y Open Source. Desde hace un tiempo que vengo utilizando Ubuntu en mi computadora, hace algunos meses atrás tenía ganas de probar algo distinto y pero no muy diferente a mi querido Ubuntu, sobretodo luego de la versión 15.04 que no me convenció. Ya había sentido nombrar Linux Mint hace algunos años atrás, así que decidí instalarlo y les cuento mi experiencia.

Linux Mint esta basado en Ubuntu así que era ideal para dejarlo por otra alternativa Open Source parecida y con el slogan que posee una interfaz moderna y elegante.

Mint tiene 4 ediciones, la mismas son:


  • MATE Edition (Escritorio MATE)
  • Cinnamon Edition (Escritorio Cinnamon)
  • KDE Edition (Escritorio KDE)
  • Xfce Edition (Escritorio Xfce)
Podes elegir la que más te guste, algo que me pareció interesante es que tenemos una ISO con los codecs ya instalados en el sistema operativo que te va a ahorrar tiempo en personalizar tu sistema o si no queremos violar ninguna ley podemos bajar otra sin los Codecs, especialmente si estamos en un país con leyes de patentes fuertes como Japón o USA. Pueden descargar la versión 17.2 Rafaela acá.


La instalación es realmente sencilla y rápida, prácticamente igual a la instalación de Ubuntu.

Una vez que se completo la instalación, revise un poco el sistema y me quede pensando unos minutos ¿que me falta hacer ahora?, Mint ya había instalado todos los Codecs y trae algunas aplicaciones de uso común que no están incluidas en Ubuntu como VLC, Gimp y otras, así que no tenía demasiado para hacer más que instalar algunas aplicaciones que utilizo y comenzar a probarlo, me pareció increíble para usuarios begginers que buscan algo parecido a Windows  en uso y no les dificulte la vida con instalaciones complejas.

Lo primero que me impacto es la claridad y limpieza del escritorio con sus wallpapers, los colores de la barra de tareas, el botón inicio de Mint y los iconos de algunas aplicaciones standard como Firefox, la terminal y el explorar de archivos.


La presentación del menú inicio me gusto mucho también, sus iconos y botones, estaba cansado de la interfaz rara y a veces complicada de Unity y buscaba volver a la vieja idea del menú inicio clásico sin tener que estar modificando el sistema como en Ubuntu. Hasta la presentación del shell me parecieron elegantes con poco.


La performance del sistema es muy buena y estable, no se si fue mi percepción pero note una mínima caída de perfomance al reproducir películas o ver vídeos en youtube comparando con Ubuntu, algo igualmente imperceptible.

La forma de customizar el sistema para colocar las aplicaciones favoritas en la barra de tareas, en el menú inicio o en el mismo escritorio me parecieron una idea acertada, en especial para usuarios pocos expertos y muy familiarizados con Windows, algo que en otras distros no siempre es tan sencillo de realizar.

El explorador de archivos es muy parecido a otras distros solo que con la presentación de colores de Mint.


La gran ventaja para los que estamos familiarizados con Ubuntu, es que la instalación de aplicaciones sigue siendo la misma con el comando APT a la cabeza, el repositorio de software es el mismo como la compatibilidad de aplicaciones que podes instalar fuera del repositorio lo que nos facilita mucho el cambio de plataforma.

Conclusión:

Para aquellos Linuxeros expertos, Mint no es para ustedes,  se van a aburrir rápidamente y sobretodo si no tienen interés en la parte estética del sistema operativo.

Linux Mint es una potente e interesante alternativa para dejar Windows para los usuarios begginers o no avanzados, una distro que apunta a la estética moderna, suave y amigable para ellos, algo que personalmente creía que faltaba en el mundo Linux y que por ese motivo los usuarios todavía no se decidían por dejar Windows definitivamente. En Linux luego de instalarlo es solo comenzar a utilizarlo sin dificultad alguna.

Desde mi punto de vista estoy convencido que Linux Mint merece una oportunidad de ser probado, si con el tiempo sigue por este camino y alcanzando mayor madurez creo que podría ser un posible reemplazo a Ubuntu si no mejoran las cosas luego de la versión 15. Como punto fuerte definitivo es libre de costo y Open Source con todo lo que eso significa.

Espero estén bien. Nos Leemos!!!

Requisitos del sistema:

512MB RAM (1GB recomendado para un uso fluido).
9GB de espacio en disco (20GB Recomendado).
Tarjeta gráfica con resolución 800×600 (1024×768 Recomendado).
DVD o puerto USB.

Notas:

La ISO de 64-bit puede butear con BIOS o UEFI.
La ISO de 32-bit puede bootear solo con BIOS.
La ISO de 64-bit es recomendada para cualquier computadora moderna.


Sunday, August 30, 2015

Overtake a truck safer with Samsung. Adelantar camiones en la ruta es más seguro con Samsung.


English Version:

If you're an impatient driver who can not go to low speed behind a truck on highways, Samsung helps you to overtake it in a safer way with back panels in their trucks.

¿What do you think?

Spanish Version:

Si sos un conductor impaciente que no puede ir a baja velocidad detrás de un camión en la ruta, Samsung te ayuda a adelantarte de una forma más segura con los paneles traseros de sus camiones.

¿Que te parece?


Source: http://www.geek.com/news/samsung-safety-truck-uses-huge-display-to-allow-safe-overtakes-1632264/

Monday, July 13, 2015

Easy and Free Monitoring Tool. Fácil y gratuita herramienta para monitoreo.


English Version:

Hello everyone,

Today I'm going to tell you about an Open Source Monitoring Tool named Centreon-Nagios.

You may knew or heard their names but if you are not familiar with them, I'm going to explain it briefly.

I will be brief, Centreon-Nagios is a tool that monitors network routers, services, servers, etc. using the network protocol SNMP. In case you can not hire a paid monitoring solution, Nagios is a great alternative.

I have installed to monitor Windows servers, we didn't have a solution for these tasks, and we asked for budgets but they were too expensive for our company, on the other hand I have seen over the years many pay solutions to perform these activities and they are not a guarantee of good performance and administration.

Nagios and Centreon are installed and configured on Linux, if you do not have much knowledge about this operating system like me, do not worry, download CentOs ISO (Linux) that have embedded Centreon to assemble the entire structure and which you can manage with web browser to avoid doing everything from Linux. Only you have to assign an IP address if you prefer to be static or DHCP (automatic), the installation is actually very simple and it's documented on the website if you need to check it.

To download Centreon-Nagios click here.

Centreon is the configuration console that will allow you to create the hosts, services, notifications, commands, etc. from which you can monitor them with Nagios console.

Everything will be configured from your web browser, the important thing is if you need to give access to other support teams that will monitor services or certain devices, you will give them the link to Nagios console so they can manage their devices and you can decide which permissions they should have, while you have access to Centreon to set everything without anyone change something.


The interesting thing about the ISO, Centreon brings many basic commands for Monitoring  Windows, Linux, Routers, physical hardware equipment, etc. without you waste a lot of time setting up.


You got two options for monitoring client computers:

1) NSClient ++ Agent (Fast and little knowledge): this agent is lightweight and does not require a restart, the most important advantage is the simplicity of configuration, Centreon will communicate with the agent and will send all the basic commands that come with Centreon, you can use them quickly without create them. The disadvantage is that it has limitations for example if you want to monitor more complex things or where you can not install NSClient++ (a router). Download here.


2) SNMP protocol (For advanced users): The big advantage is the robustness of this protocol, you only have to create a community and install the service where necessary to make SNMP queries, all communications equipment often use this protocol, you can querying to Windows, Linux, DRACs, ILOs, Switches, etc. anything you can want, the important is if the basic commands that brings Centreon are basics or useless, learning some commands you can build it yourself, import plugins from open source community to use, etc. The disadvantage is the complexity, you need to have an idea of what is the SNMP protocol, communities, etc. but it is not very difficult to understand.

Once Centreon is up and configured, Nagios can start to see downtime alerts service, equipments or whatever you want to monitor. We will have full control of our environment to be able to get reports of performance.


Finally I suggest you build notifications, it will notify you by mail when some service or equipment is in critical condition, you can build everything as you best think according to the environment you are managing. I have right now notifications for most common things such as memory, CPU, disk, services, etc.


You can configure anything you think with Centreon, build templates of equipment or services to configure many at the same time with the same settings, you can create groups to keep them sorted by categories as you think best, build tree alerts, when  the main router of a site is down others equipment on the same site do not send alerts until the main route is online again to avoid receiving unnecessary notifications. You can set to see all your dacatenceter with racks and each computer connected if you want to.

Nagios is really a very powerful tool for monitoring equipment, the best is Open Source and you can customize many things, there are many other features that here I am not mentioning but I invite you to try it and take out your conclusions. The strong of Centreon-Nagios is the community behind, helping and answering questions. The online documentation is very well written and even with images. At the moment only English and French, this is the only drawback if you do not know languages, you can visit from here.

Do not forget to leave your thoughts, we're reading!!!.

Spanish Version:

Hola a todos,

hoy les voy a contar sobre una herramienta para monitoreo Open Source llamada Centreon-Nagios.

Es muy posible que la conozcas o la hayas sentido nombrar pero en caso de que no, acá explico un poco de que se trata.

Voy a ser breve, Centreon-Nagios es una herramienta de red que monitorea routers, servicios, servidores, etc. mediante el protocolo de red SNMP. En caso de no poder contratar una solución paga de monitoreo, Nagios es una gran alternativa.

En mi caso lo instale para monitorear servidores Windows, no teníamos una solución para hacer estas tareas y cuando pedimos presupuestos eran muy costosas para nuestra empresa, por otro lado he visto con el paso de los años muchas herramientas pagas para realizar dichas tareas y tampoco son una garantía de buen funcionamiento.

Nagios y Centreon se instalan y configuran en Linux, si no tenes muchos conocimientos de este sistema operativo como yo, no te preocupes descarga la ISO de CentOs (Linux) que tiene embebido Centreon para armar toda la estructura y que se puede administrar vía web para no tener que estar haciendo todo desde Linux. Solamente es asignar una IP en caso que prefieras que sea estática o DHCP (automática), la instalación es realmente es muy simple y hasta esta documentada en el sitio web si lo necesitas verificar.

Para descargar Nagios-Centreon click acá.

Centreon es la consola de configuración que te va a permitir crear los hosts, servicios, notificaciones, comandos, etc. desde donde vas a poder monitorearlos con la consola de Nagios. Todo lo vas a configurar desde tu navegador web, lo importante de esto es que si necesitas darle acceso a otros equipos de soporte para que vayan monitoreando servicios o ciertos equipos, solamente les vas a dar el link para Nagios así pueden ver los equipos y vos decidir que tipo de permisos deben tener, mientras que vos tenes acceso al Centreon para configurar todo sin que nadie modifique algo.


Lo interesante de la ISO, es que Centreon trae muchos comandos básicos de Monitoreo para equipos Windows, Linux, Routers, Hardware físico, etc. sin que pierdas mucho tiempo configurando.


Tenes dos alternativas para que los equipos clientes pueden ser monitoreados:


1) Agente NSClient ++ (Rápido y con pocos conocimientos): este agente es muy liviano y no requiere reinicio, la ventaja más importante es la sencillez de configuración, Centreon se va a comunicar con el agente y enviará todos los comandos básicos que vienen con Centreon, vas a poder utilizarlos rápidamente sin tener que crearlos. La desventaja es que tiene limitaciones si buscamos monitorear cosas más complejas o en donde no se pueda instalar el agente por ejemplo en un router. Descargar aquí.


2) Protocolo SNMP (Para usuarios avanzados): La gran ventaja es la robustez de este protocolo, solo tenes que crearte una comunidad e instalar el servicio en donde sea necesario para hacer consultas SNMP, todos los equipos de comunicaciones suelen utilizar dicho protocolo, podes hacer consultas a equipos Windows, Linux, placas de DRACs, ILOs, Switches,etc. de cualquier cosa que  quieras, lo interesaste es que en caso que los comandos básicos que trae Centreon no te sirvan, aprendiendo un poco los comandos podes armarte los tuyos propios, importar plugins de la comunidad Open Source para utilizarlos, etc. La desventaja es solo la complejidad, tenes que tener una idea de lo que es el protocolo SNMP, las comunidades, etc. pero tampoco es algo muy difícil de entender.

Un vez configurado Centreon, Nagios puede comenzar a ver alertas de caídas de servicios, equipos o lo que quieras monitorear. Vamos a tener un control total de nuestro ambiente hasta poder sacar reportes sobre la performance del mismo.


Por último te sugiero armar las notificaciones, te va a notificar por mail cuando algún servicio o equipo este en estado crítico, acá también poder armar todo según te parezca más mejor según el ambiente que estés administrando. Yo por ahora tengo notificaciones para las cosas más standards como memoria, cpu, discos, servicios, etc.


Podes configurar cualquier cosa que te ocurra con Centreon, armar templates de equipos o servicios para que configurar varios al mismo tiempo con una misma configuración, podes armar grupos para tenerlos divididos por categorías según te parezca mejor, armar cascadas de alertas por si te se cae el router principal de un site los equipos en ese site no envíen alertas hasta que este online nuevamente para evitar recibir notificaciones innecesarias por ejemplo hasta podes configurar para ver todo tu dacatenceter con el rack y donde está conectado cada equipo en caso que quisieras hacerlo.

Realmente Nagios es una herramienta muy poderosa para monitoreo de equipos, lo mejor que es Open Source y permite personalizar muchas cosas, hay muchas otras funcionalidades que acá no estoy mencionando pero te invito a lo pruebes y saques tus conclusiones. El fuerte de Centreon-Nagios es la comunidad que hay atrás ayudando y respondiendo preguntas. Igualmente la documentación online esta muy bien redactada y hasta con imágenes. Por el momento solo en inglés y Francés, este es el único punto en contra si no te llevas bien con estos idiomas, podes acceder a la misma desde acá.

No olvides de dejar tus opiniones, nos leemos!!!.


Friday, June 19, 2015

Do you need a messaging Server (Chat)?. ¿Necesitas un servidor de chat?


English Version:

Hi all again,

Today I want to tell you about an application unknown for me to configure a Messaging Server (chat). Openfire is called, I will not tell too much on how to install it and configure it, just tell you about some of its functionality.

The company which I work didn't have a software of this kind, according to my experience, I think is important today to speed up the conversations. A teammate told me " try Openfire to see if it is useful for you" and here we are.

If you don't have a chat application such as Microsoft Lync, IBM Lotus Sametime, etc. for reasons of cost, this application is good for those small companies that do not have a budget to implement these solutions.

Openfire is an Open Source software, which means that your code is free and there is a community behind that develops, maintains and disseminates each day, in other words you can install for free. It uses the XMPP protocol (known as Jabber) as other big companies use for messaging services such as Google, IBM, Apple to name some.

If you are interested in knowing more about this philosophy, why you should use a Enterprise chat in your company, etc. I leave you the below link to investigate: http://www.igniterealtime.org/about/index.jsp

Ignite's people suggests using Openfire with "Spark" chat client which can be downloaded from the same site on: http://www.igniterealtime.org/downloads/index.jsp, they say that Spark has more features but you can use other messaging clients that support the XMPP protocol it is also possible.


You can install Openfire on Windows, Mac and Linux servers obviously. Let me summarize things that you can see for yourself on the site and go straight to my experience.

In my case I installed Openfire on a Windows 2012 R2 server, I love to use the latest technologies, the application weighs only about 43 MBs very light. It reads XML configuration files which they are displayed simpler from an admin console that is accessed from web browser. The installation is simple, no special knowledge.

You can use the embedded HSQLDB database that is often used for demonstrations or Labs but it supports other database engines like MySQL, Oracle, Microsoft SQL Server, IBM DB2 and PostgreSQL. My intention was to install it in my workplace, I mounted the database on SQL 2012, remember I'm a Wintel guy.


The default installation users and groups can be created manually in my case I already have an Active Directory structure so I only used the LDAP protocol of the application to read the AD database (such as Read-Only ) and bring users with their respective access automatically to Openfire.


Once you have configured the server only you have to install the Spark client and connect to the server. Just enter your user id depending how they are configured on server, add your server name and nothing else.


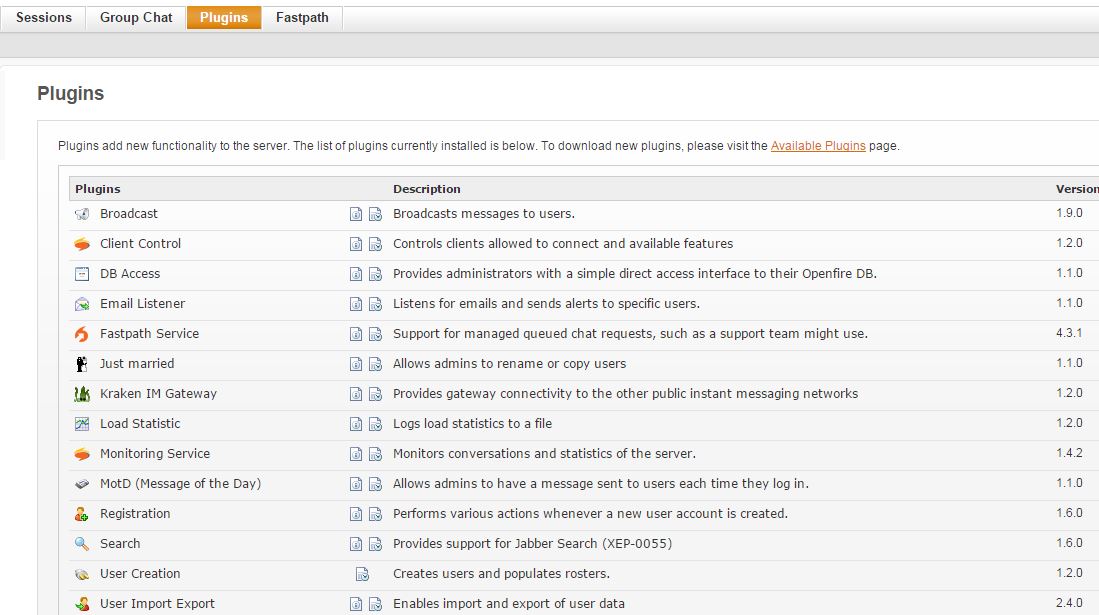
Now you are able to start chatting and testing the application, a great advantage of Openfire is the ability to install plugins that allow us to add more functionality to the server with only upload it, you can integrate them to chat with your Google or Facebook accounts, yes you are reading well!!!. They can be downloaded from http://www.igniterealtime.org/projects/openfire/plugins.jsp


From the admin console, you can access various things like current sessions, users and groups created, database information, you can change other settings, etc.


I'm finishing this post, if you're looking for to have a economic server in your company, Openfire is a great solution, currently in version 3.10. Sometimes Open Source software discourages me a lot because it can be very powerful but difficult to use, very simple but limited, very good but with a community that does not give us many answers or does not fix bugs, etc. but talking about Openfire I was really surprised.

I said everything today, I can only invite you to try it on your own and give a chance to Open Source software.

I let you some reasons why it convinced me. Do not forget to leave your thoughts.

We're reading!!!.


Some interesting advantages:

- Application light and easy to set up.
- Supports Clustering.
- Administration via web browser.
- Supports LDAP protocol for corporate environments.
- It can run on all Windows Server versions. (in my case)
- Plugins to choose based utility.
- A community that responds quickly and even a support team.
- Supports Jabber protocol (XMPP) compatible  with many messaging clients.
- Supports enterprise database engines.
- Email Listener.
- Encryption.
Spanish Version:

Hola a todos de nuevo,

hoy quería contarles sobre una aplicación que desconocía para configurar un servidor de chat (messaging). La misma se llama Openfire, no voy a detallar demasiado en como instalarla y configurarla si no contarles algunas de sus funcionalidades.

La empresa en la cual trabajo no contaba con un software de este estilo algo que según mi experiencia laboral me parece importante hoy en día. Un compañero me dijo que probará Openfire a ver si me servía para mi propósito y acá estamos.

Primero vamos por partes como diría Jack (chiste viejo), si no cuentan con una aplicación para chat como Microsoft Lync, IBM Lotus Sametime, etc. por cuestiones de costo, esta aplicación es ideal para aquellas PYMEs que no cuenten con un presupuesto para implementar estas soluciones.

Openfire es un software Open Source, lo cual significa que su código es libre y hay una comunidad atrás que la desarrolla, difunde y la mantiene día a día, en otras palabras se puede instalar de forma gratuita. Utiliza el protocolo XMPP (conocido como Jabber) que utilizan otras grandes compañías para sus servicios de mensajería como Google, IBM, Apple por mencionar algunas.

Si tenes interés en saber más sobre esta filosofía, porque deberían utilizar un chat empreserial en tu empresa, etc. les dejo el siguiente enlace para que investiguen: http://www.igniterealtime.org/about/index.jsp

La gente de Ignite Realtime sugiere utilizar Openfire con el cliente para chat "Spark" que pueden descargar desde el mismo sitio: http://www.igniterealtime.org/downloads/index.jsp , según ellos contiene más features que aprovecha la herramienta pero si queres utilizar otros clientes de mensajería compatibles con el protocolo XMPP también es posible.


Openfire es posible instalar tanto en servidores Windows, MAC y Linux obviamente. Resumo para no hablar tanto de cosas que podes ver por vos mismo en el sitio y voy directo a mi experiencia de uso.

En mi caso instale Openfire en un servidor Windows 2012 R2, si me encanta utilizar lo último, la aplicación pesa tan solo unos 43 MBs aproximadamente, muy liviana. Prácticamente lee archivos de configuración XML que luego son visualizados más amigablemente desde una consola de administración web que se accede desde el navegador. La instalación es algo muy simple.

Es posible utilizar la base de datos embebida HSQLDB que se suele utilizar para demostraciones o pruebas de laboratorio pero soporta otros motores de base de datos como MySQL, Oracle, Microsoft SQL Server, IBM DB2 y PostgreSQL. Como mi intención era instalarla en mi empresa, monte la base de datos  SQL 2012, recuerden que soy un chico Windows.


La instalación por defecto permite ir creando los usuarios y grupos manualmente, en mi caso ya cuento con una estructura de Active Directory en mi empresa así que solamente utilice el protocolo LDAP de la aplicación para leer la base de datos de AD (como Read-Only) y tener los usuarios con sus respectivos accesos automáticamente en Openfire.


Una vez que tenes configurado el servidor solamente tienen que instalar el cliente Spark y conectarse al servidor. Solo ingresen su usuario según como hayan configurado el servidor, agregan el nombre del servidor y nada más.


Luego podes comenzar a chatear para ir probando la aplicación, una gran ventaja de Openfire es la posibilidad de instalar Plugins que nos permiten agregar más funcionalidades al servidor con solo subirlos, pueden integrarlos para chatear desde tu gmail o facebook, si leiste bien!. Estos los podes descargar desde http://www.igniterealtime.org/projects/openfire/plugins.jsp


Desde la consola de administración se pueden acceder a varias cosas, como las sesiones actuales, los grupos y usuarios creados, información sobre la base de datos, es posible cambiar otras configuraciones más, etc.


Para ir finalizando, si estás buscando tener un servidor de manera económica en tu empresa, Openfire es una gran alternativa, actualmente está en la versión 3.10. En ocasiones el software Open Source me desanima mucho porque puede ser muy potente pero difícil de utilizar, muy simple pero limitado, muy bueno pero con una comunidad que no da muchas respuestas o no corrige los problemas, etc. pero en el caso de Openfire me sorprendió por todo lo contrario a estas cosas.

He dicho todo por el día de hoy, solo te puedo invitar a probarlo por tu propia cuenta y que le des una oportunidad al software libre.

Abajo de todos les dejos los motivos por lo cuál me convenció. No olvides de dejar tu opinión.

Nos leemos!!!.


Algunas ventajas interesantes:

- Aplicación liviana y fácil de configurar.
-  Soporta Clustering.
- Administración web mediante navegador.
- Soporta LDAP para ambientes corporativos.
- Se puede ejecutar en todas las versiones de Windows Server (en mi caso)
- Muchos plugins para elegir según utilidad.
- Una comunidad que responde rápidamente y hasta con soporte.
- Soporta el protocolo Jabber (XMPP) compatible con muchos clientes de mensajería.
- Soporta motores de base de datos enterprise.
- Email Listener.
- Cifrado.